Water Heater Installation Checklist And Recommended Water Heater Accessories

Modern, efficient water heaters are fast becoming a popular addition to multi-family buildings like apartment complexes. They can save money on utilities, and offer residents fast, reliable hot water. As new apartment buildings go up across the country, you'll want to make sure you can stay on top of the demand.
So how can you make sure your installations are working properly, go smoothly, and are up to code? As with any contracting or construction job, doing the work correctly is half the battle. But the right tools can take you that extra mile from good to excellent, making installation simple enough that even people new to your team can get it done right.
Here we'll go over some of the common building codes to be aware of during a water heater installation, a step-by-step checklist for installing a water heater, and the tools that can help take your service over the top.
Common Codes to Be Aware of When Installing A Water Heater
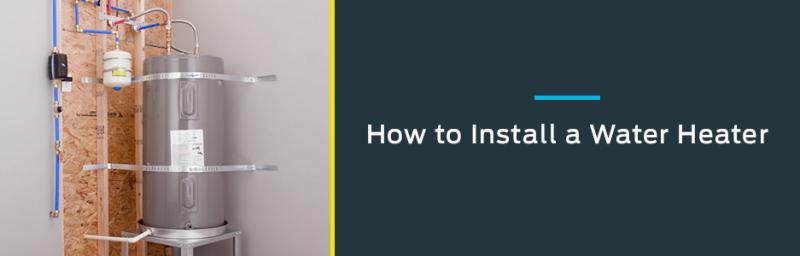
In west coast states like California, a very important consideration when installing or building anything is earthquake safety. Not only can falling equipment and debris from an improperly secured water heater be a hazard, but broken gas lines from earthquake damage can result in fires or explosions. According to the 2010 building code, “water heaters in California “must be strapped down or anchored to resist horizontal displacement due to earthquake motion (2010 CPC 508.2).
To make sure your water heater is secured in the event of a seismic disturbance, HoldRite offers several quick, easy-to-use options for water heater restraints, including the QS-50 strap galvanized steel restraint. The belts are adjustable, secure at the front of the tank for ease of access, and rated up to 80 gallons.
Read more: A closer look at the importance of earthquake straps for water heaters.
Other common codes to be aware of during a water heater installation:
- Approved expansion tanks are required to be installed in the cold water distribution piping downstream of each pressure regulator on the tank, to prevent excessive pressure buildup during thermal expansion of the water (2010 CPC 608.2). You’ll also need to install one on any water system with a check valve, backflow preventer, or any other normally closed device that prevents water pressure from dissipating back into the water main (2010 CPC 608.3).
- If your water pressure is above 80 PSI, installing a pressure regulating valve is recommended. High water pressure can damage plumbing and fixtures and could crack the glass lining of the water heater unit.
- Always install a pan and drain line beneath the water heater tank, especially when located in an attic, floor-ceiling assembly, attic-floor assembly, or floor-subfloor assembly where damage can result from water leaks (2010 CPC 508.4).
- Installing a dedicated water shutoff is useful for maintenance on the water heater unit, as it allows you to shut off water to the water heater without cutting off water to the rest of the home. Just make sure they’re not placed between the relief valve and the water heater or on discharge pipes (2010 CPC 505.6).
- Make sure your water heater is installed in an approved location where there is proper ventilation, as they emit carbon monoxide, a colorless and odorless gas that can have severe health consequences if levels become toxic.
- Place a sediment trap on the water heater as close to the inlet as you can on the gas line into the unit. That helps catch debris and moisture before they can get inside the firing chamber of the water heater.
Always be sure to review your state’s building codes carefully before installation, as they may vary from state to state.
How To Install A Water Heater
These steps will apply to the installation of new water heaters to replace existing ones and will be a brief overview of each step.
Step 1: Drain The Old Water Heater
Draining the old tank will make the unit you’re replacing lighter and easier to carry off, especially if the old tank has to be carried down from an attic or just downstairs. It’ll also cut down on mess at the worksite.
Step 2: Shut Off The Gas and Remove The Flue
For safety’s sake, make sure the gas is turned off at the valve before disconnecting the gas line. If the flue is reusable, it can be saved and reattached to the new unit once installed. Be careful here not to twist or wrench the joints too much, as they may have become stiff over time and could be more susceptible to breakage.
Step 3: Disconnect The Gas Line
The phase of the installation probably requiring the most care is disconnecting the gas line. Loosen the line slowly, with an ear out for the sound of escaping explosive gas. Should you hear that sound, tighten the line back up as quickly as possible. This shouldn’t occur after the line has been shut off, but better to be safe than sorry. Once you’ve disconnected the line at the union, the portion of the old gas line still attached to the old tank can be removed and reused if in good enough condition.
Step 4: Separate The Old Tank From The Water Lines
There will be slightly different considerations when cutting the hot and cold water lines from your tank. On the hot water side, draining the tank should take care of any mess that would’ve resulted from cutting that line. You’ll want to cut as close to the tank on the hot water side as you can, and it may be possible to reuse the valve on the cold water side if it’s still in good enough shape.
Step 5: New Installation
Installation of the new heater works backward from taking out the old one. In brief, the process will likely be as follows:
- Attach the cold water line.
- Attach the hot water line.
- Begin filling the new tank with water, inspect for leaks.
- Hook the gas line to the new tank.
- Hook up the flue to the new tank.
- Hook up the runoff tube.
- Relight the pilot light, then turn the new tank on.
This is an overview of a basic installation. If any expansion tanks or other equipment are needed, the process will, of course, be slightly different.
The Tools To Help You Do The Job Right
HoldRite’s line of water heater accessories includes everything from earthquake restraints to wall mounts to hoses and drain pans, all up to code and ready to use. Our durable, compliant, proven parts can help your next job could go more smoothly. Read more about these accessories.